
In the community workshops the participants began by making a smaller piece. Once their skills (and commitment) were established, they helped create a section of the central mosaic that we designed together.
Here is the step-by-step method to create a precast mosaic. This is abridged from the Complete Pebble Mosaic Handbook by Maggy Howarth. The technique will be the same for the larger pieces.
Also visit www.kathleendoodydesign for additional technical information.
1. The design
The size of mosaic done by each school child will by 6” x 9” x 2 3/8” deep. They will collect the pebbles on the island beaches (see item Good Stones and Bad Stones) and draw up a design.
2. The pattern
The design will be taped to a piece of plywood and covered with a protective sheet of clear plastic.
 3. Building the mold
Pieces of 2” x 4” ripped to 2 3/8” deep, cut to length and predrilled for the nails will be assembled over the pattern. These must be squared, and precisely sized to the exact dimensions of our paving stones.
4. Organizing the pebbles
Many, many more pebbles will be needed than are used in the final piece. They should be assembled close to hand and assorted for colour and size. The use of any “special” rocks collected by the child will be encouraged. They will practice placing the rocks in different patterns before we begin the actual piece.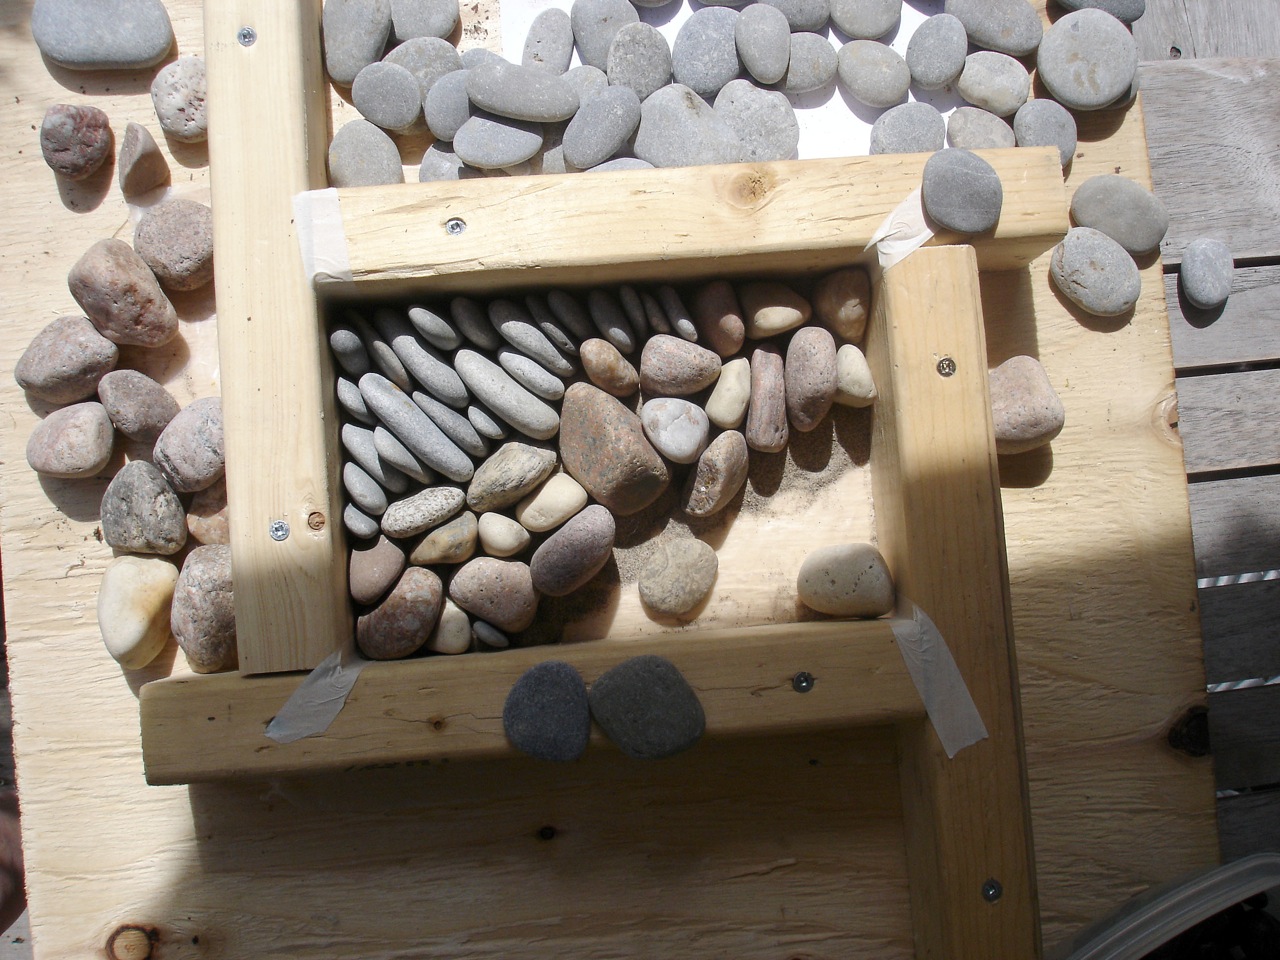
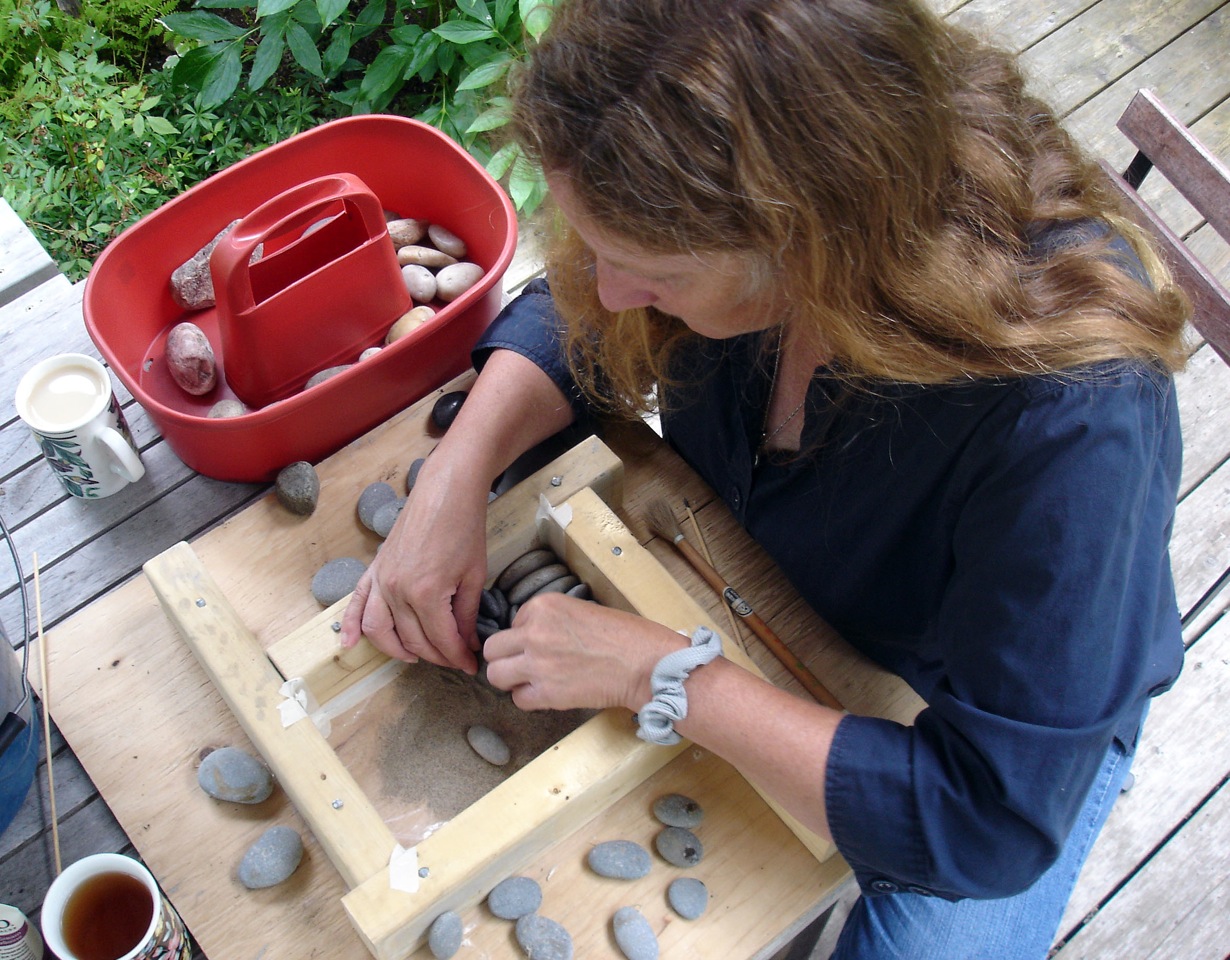
Each pebble must be selected as appropriate for the design and placed with its top side down on the pattern. This is a bit tricky because you won’t actually be able to see what the finished piece will really look like, since you will be seeing the bottoms of each pebble. Not only that, but the pebbles will be set into sand, which will cover the part of the pattern that you are working on. Also, in a larger mold, the pebbles tend to fall over a lot until there are enough placed to support each other. Larger pebbles can be used as supports to begin with.

Dry, sieved "playbox" sand is worked around each pebble as it is placed in the mold. With a small, soft paintbrush it is brushed to a depth of about 5/16”. When the mosaic is cast and removed from the mold this sand will be washed away, leaving the pebbles protruding above the grout. If you didn’t do this, the grout would flow to the base of the mold, almost covering all the pebbles.

7. Testing the sand depth
To test the sand depth, get a narrow stick, a bamboo barbeque skewer for example, and whittle the end with an Olfa knife to a narrow peg of 5/16”. As you go along, poke the sand to see that it comes to the top of the peg and adjust accordingly.
 8. A final check
I rarely get this right when I am laying the pebbles, mainly because I have to move them around so much. So, when I think I’m finished I position a bright light directly overhead and start poking all over. I use a squeezy bottle from a dollar store filled with sand to add small amounts of sand where needed. It takes a bit of practice.
 9. Wetting the sand
Wet the sand thoroughly with a fine spritzer. This prevents the sand from sucking the water from the grout and assists in even penetration of the grout between the pebbles.
10. Mixing the grout
 Use a special shrink-resistant cementitious (I LOVE that word) grout. Mix it with water according to the instructions on the bag using a paddle attachment on an electric drill. This smooth, sand-free grout allows penetration between all the pebbles, and won’t shrink away from them over time.
 11. Pouring the grout
Pour the grout evenly over the pebbles. For the small mosaics (6” x 9”) we will fill the mold to the top. With larger mosaics, add the grout until the mold is about half full. A gentle hammering around the periphery helps to release trapped air bubbles. The mosaic must be left for awhile until it becomes the consistency of putty. With the grouts I’ve tried, this takes almost a day. You want the grout to be firm enough to hold the pebbles in position securely for the next step, but not so hard that you get cracks in the surface.
12. Adding the concrete
Fill the mold with concrete. I use a pre-mix, with additional aggregate. Take care to pat the mix down at all the edges.
13. Tamping it down
Using a piece of wood longer than your mold, tamp down on the brimming concrete until a smooth surface is achieved, adding more where needed. Any excess can be removed by sawing the wood back and forth and sliding the extra concrete off the end. Hammer around the outside edges again to help release any air bubbles. Cover the mold with plastic and seal the edges to prevent drying out. The concrete will soon set and will be reasonably hard by the next day.

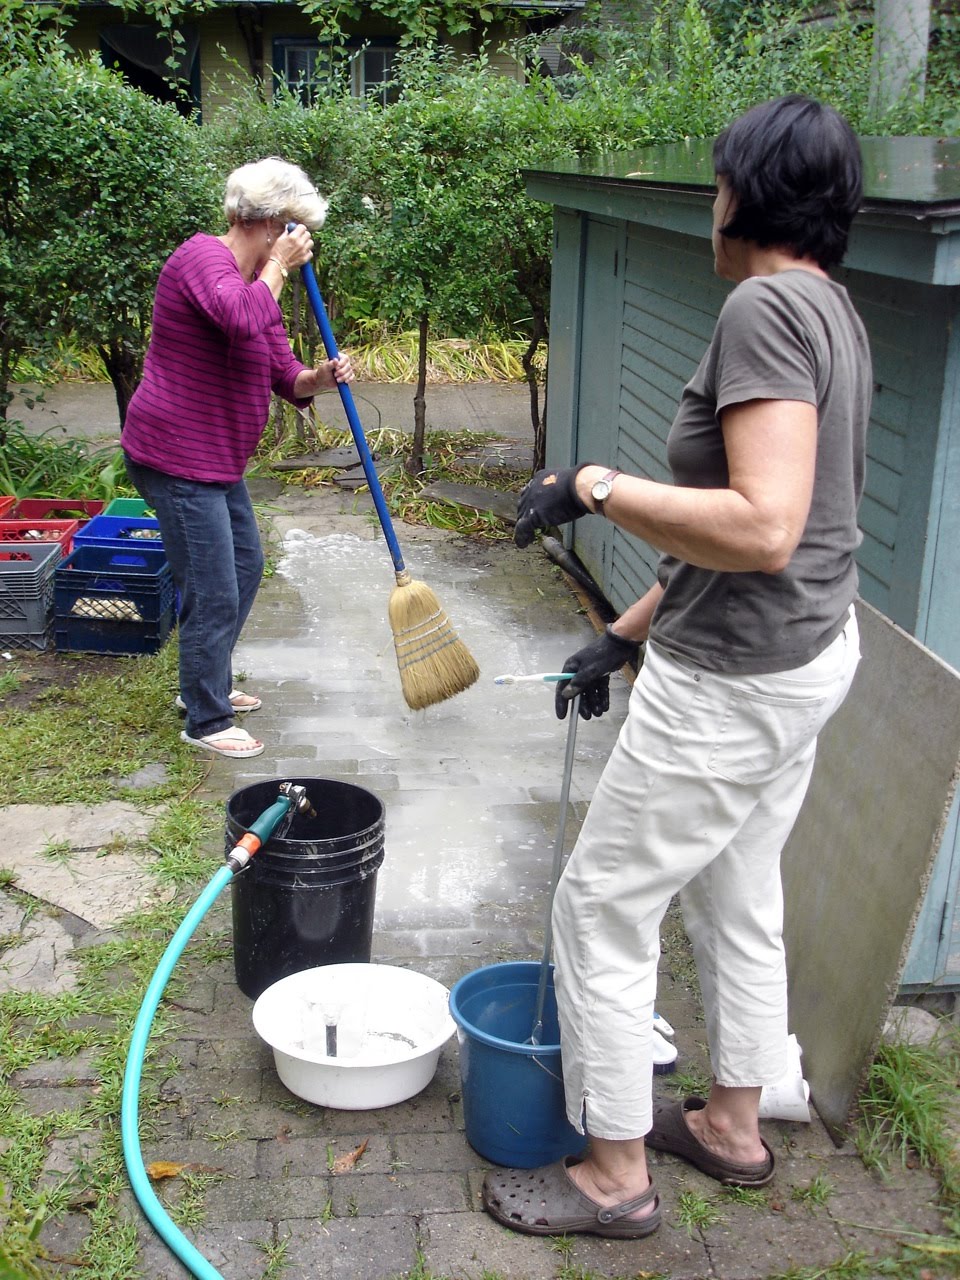
The grout and concrete will still be “green” the next day so be careful not to knock the edges. Pry off the wood mold to be cleaned up for future use. Stand the mosaic on its edge and brush off the sand. VOILA! This is the exciting bit where the mosaic is revealed. Hose down the piece to remove the last of the sand.

Before the grout sets any more, any high bits can be chiseled away. The sharp edges can be rounded at this time as well.
16. Curing
The mosaic must be completely wrapped in plastic and the edges sealed to prevent it drying out while curing. It achieves 90% of its strength in three days but needs 28 days wrapped and damp to reach maximum strength.
hi kathleen,
ReplyDeleteit's leah here from MABELLEarts. we're wondering if it is helpful to occassionally or even daily (?) wet the finished and wrapped tile while it continues to cure? thanks!!!!
Yes that’s a good idea especially if the air is warm and dry.
DeleteAnother project with rocks =)
ReplyDeleteMay this project able to be started during winter? Temps inside garage...35°. Outside temps around 32°to 0-5°. The water in the garage is heated. Thank you so much. Barb
You can create the mosaics in a heated space during the winter. Once the pieces have been cast, however, they must be wrapped in plastic and cured for 28 days in temperatures above zero. After the 28 days they can be unwrapped and stored at any temperature.
ReplyDeleteThat is amazing! I don't think I have time to do that though with my schedule. Where could I find tile in toronto that would simulate something like this?
ReplyDeleteYou could buy a pebble mosaic ready made, or custom order one. Visit my site at:
ReplyDeletehttp://www.kathleendoodydesign.com/pebble-mosaics/
This comment has been removed by a blog administrator.
ReplyDeleteWish I had the time to do this, looks fantastic! My driveway is made of pebble mix, it's a similar look.
ReplyDeleteGracias por el tutorial y las fotos saludos desde Perú.
ReplyDeletehttp://www.pinterest.com/pin/536350636845279597/ una foto de nuestro resultado.
Thanks for the link!
Deletehi kathleen- i just tried this but my grout became the consistency of peanut butter and it wouldn't really go in between each pebble. can i add more water to make it more liquidy so it will easily go between the pebbles? what consistency do you get your grout before pouring it in? thank you
ReplyDeleteDid you mix the cementitious grout thoroughly with an electric mixer for the length of time indicated on the packaging (the kind I use requires 6 minutes)? I find that the mix goes very thick and difficult, and you have to dig at it a bit and break it up. It takes awhile for it to become more liquid.
Deleteso i assume there must be a difference between cementitious grout and regular standard grout? is the cementitious kind more flowing? because i've tried this again and the regular grout is so thick it doesn't flow into the spaces between the pebbles.
DeleteYes, the cementitious grout has a high percentage of cement as well as a plasticizer and is usually sand-free to allow it to flow between the pebbles.
DeleteThis comment has been removed by the author.
ReplyDeleteDear purchaser,
ReplyDeleteNice day!
This is Angela.We manufacture and supply different size and color Cobbles & Pebbles for landscaping,road paving, wall description or fountain square's use.Size like 1-2cm,2-3cm,3-5cm,5-8cm.color like white,black,yellow,red,striped and mixed.
Total are high quality with low price.
If you are interested in our production,
pls check our website:http://fpyhs.en.alibaba.com and then pick up the size you like.I will give you good price.
feel free to contact me.
Looking forwarding to get your reply.
Best regard
Angela
Company: Nanjing Fu Peng Stone Factory
Email:cobble@fpyhs.cn
angelapebble@gmail.com
What’s APP:86-13913908089
Skype:angela870031
Trademanager:cn1513369533
web: http://fpyhs.en.alibaba.com
Hi. I'm making stepping stones with glass and pebbles. Instead of grout I'm using a Quikrete sand topping mix that is smoother than concrete, and then a high strength Quikrete concrete with a lot of gravel in it for the second layer. Do you think that will work? Should I still wrap mine and let it cure for 28 days? Thanks
ReplyDeleteIt needs to be a free flowing non-shrink cementitious grout so that it will flow between the pebbles and anchor them firmly. If you want to try something else you could a small test mosaic.
DeleteThis comment has been removed by the author.
ReplyDeleteHello!
ReplyDeleteI'm trying to build an ambitous mosaic pathway at my sons school Do you think it would be possible to use a similar home made mould like the one you used but for mosaic tiles which we have been donated? All of the moulds I can find online are either too expensive or the wrong size for the deisgns. Thank you,
I can’t really comment on this because I haven’t worked with mosaic tiles.-Kathleen
ReplyDeleteCómo puedo traducir?
ReplyDeleteHi,
ReplyDeleteLoved your piece on pebble mosaic.
We know it is important to use a quality concrete mix, just like the team at South East Concrete https://www.seconcrete.com.au
Good articles, Have you heard of Mr Benjamin, Email: 247officedept@gmail.com --WhatsApp Contact:+1-9893943740-- who work with funding service they grant me loan of $95,000.00 to launch my business and I have been paying them annually for two years now and I still have 2 years left although I enjoy working with them because they are genuine Loan lender who can give you any kind of loan.
ReplyDeleteDo you think these would survive the wi ter outside? I really want to do something like this with my pathway to my house but am worried about the weather damaging the work.
ReplyDeleteDo you think these would survive the wi ter outside? I really want to do something like this with my pathway to my house but am worried about the weather damaging the work.
ReplyDeleteThanks for sharing such informative post. The best natural stone importers and retailers offers high quality Granite stone, granite paving slabs in the USA. We offer Granite home delivery services in the USA. Call Today!
ReplyDeleteworkshop paving slabs